Sunday, December 18, 2016

Lemongrass & Myrtle

I made some soap yesterday with a new to me scent blend of Lemongrass and Myrtle essential oils, equal parts. Smells great that's for certain!
 I used chromium green oxide and blue ultramarine powders for my colourants with a little green mica added to each and tried to do minimal swirling with my hanger LOL. And I did add Titanium Dioxide to the rest of the soap to whiten it up.
So its nothing too fancy, the fragrance is the star of these bars, and of course they won't be ready for Christmas. Here's a link where you will find the recipe.


Friday, December 9, 2016

Thrift Store (Sally Ann) Finds

So I've had thrift shop envy, I lot of customers have been showing be me really neat cups etc that they've picked up at thrift stores and garage sales. I took my self to the Salvation Army last week and found these treasures. The cup and saucer set was $2.00 and the pinwheel crystal wine glasses were $3.00 each. Of course they are for candles.
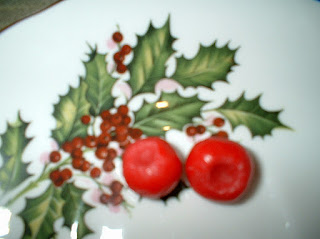
I melted a few shavings of green candle dye with the wax, trying to go for the lighter green in the holly on the teacup. The fragrance I used is a mish mash of Peppermint, Pine and Christmas Spice.

 A warm kitchen makes for nice smooth tops LOL, I am going to have to remelt the wax in the cup to add some wax berries though.
 These boxes from the dollar store (I bought a couple) will hold one of these candles perfectly, there will be room to wrap the glass in tissue paper too.
My wax berries are not the right red to go with the berries on the cup and saucer, I'm going to tone down the colour a bit. At the bottom of this post I'll put a picture of the pearlizer I used. Years ago one of my boys made a ton of beeswax candles and we used to put this pearlizer on the red and green ones, I can't believe I found it.
 So I put pearlizer on the berries and the rest of the candle too and on a whim I set it with a few hair dryer blasts. The bit of heat on the pearlizer has given it a sort of antique look in real life.
 I do not have a box for this one (yet) but I know who I'm giving this too. She's a relative who loves Christmas dishes and I hope this will go with one of her sets called The Holly & The Ivy.
 Here's the Pealizer, it looks like white eye shadow and I'm sure that would work too.
Thanks for stopping by!

Friday, November 18, 2016

Little Bath Bombs, Gingerbread Men & Trees


 I said I was going to make these in my last post. Here are some little Gingerbread Man Bath Bombs made in my new silicone mold (from Michaels) and at the same time I made Trees too. The tree mold is also silicone (for ice cubes?) and I've had it for years. This was a very small batch using 1 cup of baking soda and 1/2 cup of Citric Acid. After they had hardened I spritzed them with their respective colours and added a little glitter. These are going to little great nieces and nephews so I left the Almond Oil out, I know they often have their hair washed in the tub and no one wants oil in their hair:)
 

Tuesday, November 15, 2016

Gingerbread Candle


I may have mentioned I have been trolling the stores for a mold with little Gingerbread Men. My sister found this for me at Michaels and it is over the moon perfect. I plan to use it for soap and wax embeds and for tiny bath bombs. The little Gingerbread Men  I made today are wax and I only filled the molds about 1/4 inch.
Aren't they the cutest!


I've used another glass  yogourt container for this Gingerbread candle. The wax is scented with Gingerbread fragrance and just a hint of Christmas Spice fragrance ( I like my Gingerbread spicey) and its coloured a light tan. I had leftover wax from making the Gingerbread Men and added a bit of that coloured wax to the soy wax flakes. I'm sure the next one I do will be a little lighter or darker, I didn't pay too much attention to how much coloured wax I added.
Anyway, I'm happy with the mold and how the candle turned out. There was barely enough room for my little man, after carefully remelting the top of the candle with my hair dryer I carefully placed the Gingerbread Man with the wick sitting right in his armpit. I was prepared to cut off a bit of his hand and foot but he got to stay whole LOL.
Thanks for reading, any questions let me know!


Wednesday, November 2, 2016

Cranberry Peppermint Candles (& Yogourt)

Ok, my candles don't contain  yogourt , but the jars I used came with yogourt in them.
 
Its unusual to find yogourt in glass jars, this brand came from Thrifty's and the glass jars (once washed LOL) are great for making little candles or you could plunk a T lite or votive inside too.
I wanted to make little Cranberries for my candles so I used my silicone Blueberry mold with red wax, I'm hoping to pass them off as Cranberries due to the colour.
So whatcha think?
And here's a jar with the soy wax. I poured red coloured wax in the bottom, this wax is scented Cranberry and the red is not as dark as the Cranberries, its more of a rosie red. I thought the red wax might tint the white wax I was pouring on top (and it did a bit) so that's why I didn't make the red really dark. Once the red wax had set, it will go from transparent to opaque, the next layer was ready to be poured. The white layer is scented with Peppermint Essential Oil, yum.

Now even though my kitchen was warm, I did have a little crater around the wick after the wax hardened, which was fine, I needed to remelt the top anyway.

So below is the finished candle. I carefully remelted the top of the candle with my hair dryer. Don't go crazy or you will have wax splattering. Then I set my Cranberries on the melted wax and was really happy the red didn't bleed! They were fun and easy to make and I will use the rest of my wax berries today ( making more candles with some friends!).
Thanks for stopping by!


Saturday, October 29, 2016

Holiday Bath Bombs Trees & Gingerbread

 I'm just starting to make bath bombs for the Holidays.  These bath bombs were made in a Milky Way mold, most Milky Way molds make great bath bombs & soaps.
Above you can see I have added some colour using  green mica. I put a small about in a spray bottle with rubbing alcohol, shook the bottle and gave them a spray. The odd tree is from a silicone mold, I made a few but only one turned out:( 
 I have a star ice cube tray so I made a couple of stars too. I have rubbed some gold mica onto the detail of the trees and the tops of the stars. Then I sprinkled on some cosmetic glitter and set everything with a spray of clear rubbing alcohol.
 I tried a close up hoping the glitter would show a little better.
And lastly is the tree from the silicone mold and the only gingerbread man I was able to salvage (from the same mold). The gingerbread man is sprayed with alcohol mxed with a little bronze mica. I have a Milky Way Gingerbread mold I'm going to try because  really like the combination of bronze mica & sparkle. Thanks for reading, any questions let me know!

Friday, October 14, 2016

Buttery Bath Melts

 
These bath melts were made with equal parts Cocoa Butter and Shea Butter, for this batch I used 1.5 ounces (42 grams ) of each butter. One teaspoon of essential oil was the only liquid added, if you wanted them softer or didn't want to add essential oil you could add a teaspoon of sweet almond oil.
 
Start by melting the Cocoa Butter, either in a double boiler or in the microwave. I used a glass measuring cup in the microwave, being careful not to overheat the glass. Once you have melted the Cocoa Butter stir in the Shea Butter, its a bit of a chore because you have the same amount of both butters. Shea Butter does not like direct heat , you can melt both together in a double boiler but I prefer to melt the Cocoa Butter first, it has a much higher melting point.
Shea Butter on its own is pretty soft, some people use it "as is" because its soft enough to apply directly to the skin. You could never do that with Cocoa Butter but Cocoa Butter and Shea Butter have different moisturizing properties to they are a great combination.
To finish melting my last bits of Shea Butter I put the measuring cup in a warm water bath. You want the butters to be pourable and on the warmish side when you add the essential oil so it will mix evenly. I poured my melts in to a silicone heart ice cube tray, any small molds will do, if you make them too big you will probably want to cut them for use.
 
Lastly here is a ( not very great ) picture of two of the bath melts. I had wanted a small amount of crushed petals adorning the melts and tried doing this by sprinkling two or three little petal bits in each mold before I poured the butters in. This is what I do with my bath bombs and it works great, but with the melts the petals don't stay on the bottom. If you really wanted them visible I  think you'd have to stir a handful in to the container before pouring and that's too many petals for me. So the melts came out looking mostly like the one on the left. To add the petals I warmed a few melts up with my hair dryer , they will get a bit of a shine when  they're warm, and then pressed the melt into some petals. I like the way they look and there won't be too many petals in the tub. I kept some of the melts plain because they will also make a great solid perfume or lotion bar.
 
BE CAREFUL getting out of the bath (could be slippery) after you've used one and if you want a really shiney tub, take an old towel and polish it up while its still warm from the bath water. You will wipe off any Cocoa or Shea Butter that's on the sides and any soap scum or grime will come off with it!
 
If you've gotten this far thanks for stopping by , any questions let me know.


Saturday, October 1, 2016

Crazy Heart Soap Tray

All soap molds have been reduced to $5.00. This is the Milky Way Crazy Heart tray mold, it holds 2 pounds of soap and gives you 9 different soaps when cut, each with a different design.

Thursday, September 22, 2016

Blueberry Honey & Pumpkin Maple Soap Cake

I'll post the pictures first and then the recipe at the bottom.


This is the Pumpkin Soap Recipe from last year with the addition of some Blueberry Honey and of course it looks a little different too. I made a separate non pumpkin batch of soap for the piping and the blueberries are made with Melt & Pour soap.
 
For the piping, should give you about 1 pound of soap:
113 grams Coconut Oil
100 grams Palm Oil
25 grams Cocoa Butter
124 grams Olive Oil
 
52 grams Sodium Hydroxide
134 grams Distilled Water
 
Optional: Titanium Dioxide for whitening
 
Get these oils and your sodium hydroxide solution ready. You will want to mix this soap up before you start mixing the Pumpkin Soap. While the solution is cooling and you are slowly melting the hard oils you can start working on the Pumpkin Soap.
 
Pumpkin Soap Recipe about 3 pounds of soap:
340 grams Coconut Oil
298 grams Palm Oil
75 grams Cocoa Butter
370 grams Olive Oil
 
156 grams Sodium Hydroxide
340 grams Distilled Water
 
50 grams canned Pumpkin
20 grams Cream
2 tbsp. Blueberry Honey
 
Optional: Whatever fragrance you would like to add and any decorations, you really don't need the piping or the melt & pour blueberries if you're going for a traditional bar.
 
Mix the Pumpkin and Cream together and set aside. Measure out the honey later when you need it.
 
Get the Sodium Hydroxide solution ready, weigh out the oils and slowly melt the solids. I don't pay too much attention to temperatures but honey is a heater so try and stay below 90.
 
The smaller  (non pumpkin) batch should be cooled and ready first. So mix that first, add the olive oil to the other oils if you haven't already, then the lye solution and Titanium Dioxide. Blend to a medium to heavy trace and then just leave it in the pot where it will continue to thicken.
 
When the lye solution and the oils for your Pumpkin soap have cooled do the same. Add the olive oils to the other oils if you haven't already and then add the lye solution. Start to blend the oils and lye solution and then add the pumpkin/cream. Once you have reached a thin trace add the honey and fragrance. I used 2 tsp each of Pumpkin Crunch Cake & Maple fragrance oils.  Blend a little more to incorporate the honey and fragrance. I started filling my molds at a medium trace and it had thickened up quite a bit by the time I was finished.
 
OK now back to the soap frosting, it still wasn't thick enough to pipe once I had poured the pumpkin soap.  I had to wait for about an hour, which was OK because the pumpkin soap got to firm up a little.
Once it was thick enough I filled my piping bag and started piping not knowing if I had too much or not enough. With the amount of piping I did I had a very small amount left over, if I wasn't so wrung out at that point I could have kept adding more and used it up but I was wanting to get the berries on. In the picture at the top of the post there are a few soaps with only one berry but after I took that photo I went back added another berry to those soaps, so each soap cake and soap cupcake have two berries. The last thing I did was add some cosmetic glitter and spray the soaps with rubbing alcohol.
 
Last year I poured this soap into a loaf mold and I remember it got really hot, I think I might have put it in the fridge for a while. This soap gelled, I could see it even with the piping and I did get a small amount of ash on the cakes which steamed off easily. Its still curing but I'm really happy with it!
Thanks for stopping by, any questions let me know!


Tuesday, September 13, 2016

Gummy Bear Candles & A Soap

Here is my first attempt at layering coloured wax and adding embeds to candles. I made some little soy wax gummy bears in a few colours, you want all  of the colours different from the colour of the top layer. So below are the wax bears, there are two shades of green, I used the darker green, orange and yellow.

For the colour, I added some coloured wax beads in various colours plus some soy wax candle bits ( I save my candle scraps) to the soy wax flakes, I was kind of limited in my colour choices to what I had on hand. So in my container I had the wax flakes, some  of the coloured beads and  some grated scraps, I melted them all together in the microwave.
Each colour for pouring was melted in a separate container and once the wax was melted I added fragrance, each layer has a different scent. You can melt the layers for the candles one at a time because you have to wait for the poured layer to turn opaque before pouring the next layer. I didn't worry about temperature because soy wax has such a low melting point. I left the wicks long and positioned them with pencils (see this post).

Now for adding the wax embeds, in this case the Gummy Bears, from what I have read it is recommended to wait until the top layer had just about hardened up and then to set them with a gentle little push. I chickened out and let the wax harden as if I wasn't adding any embeds, then I melted the top a little with my hair dryer (like you would do if you were smoothing out the top) and set the bears into the melted wax. Don't melt too deep and don't hold they dryer to close, the wax could splatter. One thing I would do differently is trim the wick before melting the top. The wicks I use have a wax coating and that wax can melt and get on the coloured wax.

These were fun to make, the jars came in a pack of 4 and I made all 4 at once. I messed up on the amounts a bit, that's why the bottom layer is the thickest :)
The embed molds can be used for soap too!

Thanks for stopping by!

Gummy Bear Candles

Here is my first attempt and layering coloured wax and adding embeds to candles. I made some little soy wax gummy bears in a few colours, you want all  of the colours different from the colour of the top layer. So below are the wax bears, there are two shades of green, I used the darker green, orange and yellow.

For the colour, I melted some scented wax beads in various colours plus some soy wax candle bits ( I save by candle scraps), I was kind of limited in my colour choices to what I had on hand.
Each colour for pouring was melted in a separate container and once the wax was melted I added fragrance, each layer has a different scent. You can melt the layers for the candles one at a time because you have to wait for the poured layer to turn opaque before pouring the next layer. I didn't worry about temperature because soy wax has such a low melting point. I left the wicks long and positioned them with pencils (see this post).

Now for adding the wax embeds, in this case the Gummy Bears, from what I have read it is recommended to wait until the top layer had just about hardened up and then to set them with a gentle little push. I chickened out and let the wax harden as if I wasn't adding any embeds, then I melted the top a little with my hair dryer (like you would do if you were smoothing out the top) and sets the bears into the melted wax. Don't melt too deep and don't hold they dryer to close, the wax could splatter. One thing I would do differently is trim the wick before melting the top. The wicks I use have a wax coating and that wax can melt and get on the coloured wax.

These were fun to make, the jars came in a pack of 4 and I made all 4 at once. I messed up on the amounts a bit, that's why the bottom layer is the thickest :)
The embed molds can be used for soap too!


Monday, August 22, 2016

Oatmeal Milk & Honey Cut & Recipe

Here's the Oatmeal Milk & Honey soap from the post below all cut and trimmed.

 
I'm happy with the tops and the swirls, I didn't want a bunch of different colours and pattern, this is just enough. The recipe is below and of course you can choose your own design.
 
 
340 grams Coconut Oil
298 grams Palm Oil
75 grams Cocoa Butter
370 grams Olive Oil
 
156 grams Sodium Hydroxide
364 grams Water
 
40 Grams Cream or Milk
2 Tbsp Honey
Hand of Oatmeal
4 Tsp Oatmeal Milk & Honey Fragrance
Large pinch of bronze mica for colour
 
OK, so you see I have taken my usual recipe, which is a modification of Susan Miller Cavitch's basic bar recipe and backed of the water a bit to accommodate the 40 grams of cream. The cream, honey, oatmeal and fragrance were all added at a light trace, after I had removed about 1/2 cup of soap to colour. During the pouring I did two tiny layers, both off to one side, with the coloured soap and then did a bit of swirling with a hanger. Once that was done I gently pressed some bubble wrap onto the top of the soap and did not insulate.
 
I've also found an Oatmeal Milk & Honey bath bomb recipe from more that a few years ago.
Here's a link if you want to try them, there's a few other recipes there too.